แสดงบทความที่มีป้ายกำกับ crochet แสดงบทความทั้งหมด

วันพฤหัสบดีที่ 26 กุมภาพันธ์ พ.ศ. 2569

Crochet Bowling Pin Keychain Tutorial


Bowling Pin Keychain (US Terms)

Materials

  • 4 ply yarn (equivalent to US Light / DK weight – Category 3) – white and red

  • Polyester fiberfill stuffing

  • 2.5 mm crochet hook (Tulip 4/0)

  • Stitch marker

  • Scissors

  • Yarn needle

  • Keychain ring

Crochet using US terminology and work in continuous rounds (do not join rounds unless stated).

R1: MR, 6 sc (6)

R2: 6 inc (12)

R3: 12 sc (12)

R4: [sc, inc] x 6 (18)

R5: sc around (18)

R6: [2 sc, inc] x 6 (24)

R7–R11: sc around (24) – 5 rounds

R12: [2 sc, dec] x 6 (18)

R13: [sc, dec] x 6 (12)

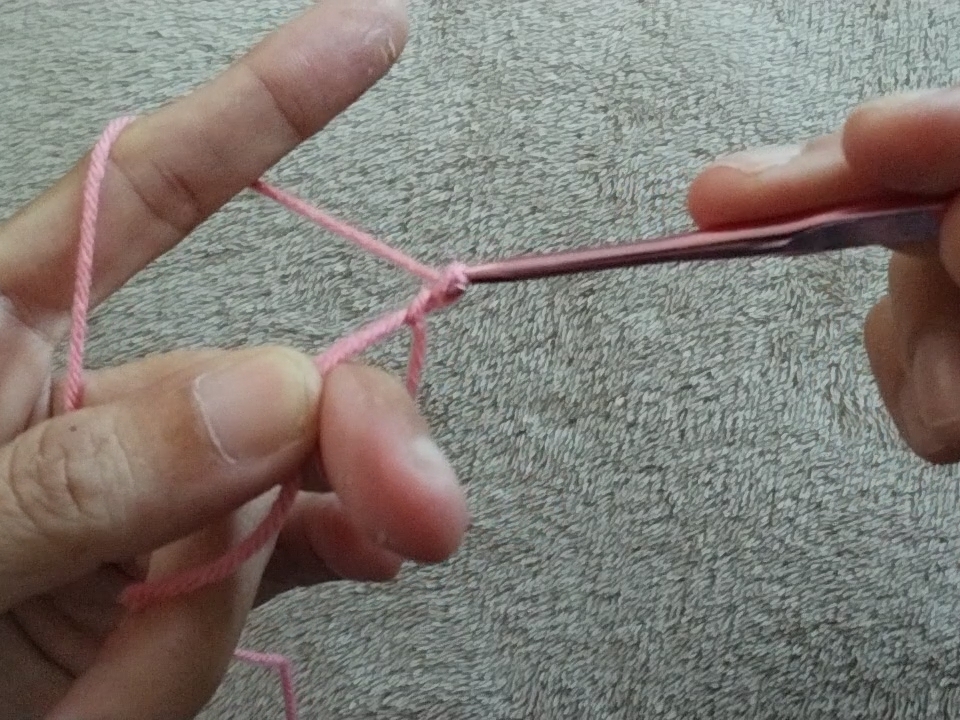
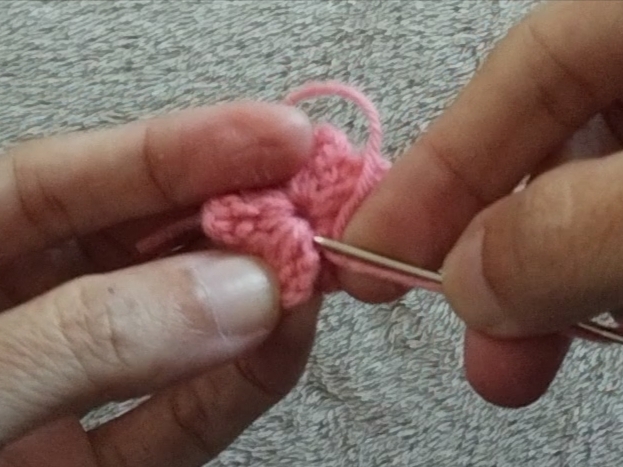
At this step, close the round neatly: Remove the hook from the loop, insert it from the inside into the next stitch, pull the loop through to create a seamless finish. Change yarn color to red, then ch 1.

stuffing

R14: sc in the same stitch and make 10 more sc , In the next 2 stitches : yarn over and pull through all loops to join and close the round.

Fasten off following the same closing method as R13 to change color (White). (12sc total)

R15: repeat the same method as R14. change color (Red)

R16:  repeat the same method as R14.  change color (White).

Continue:

R17: 12 sc

(do not close the round at the end).

R18: [2 sc, inc] x 4 (16)

R19: [7 sc, dec] x 2 (18)

R20: sc around

R21: [4 sc, dec] x 3 (15)

R22: [3 sc, dec] x 3 (12)

R23: 6dec (6)

Add more stuffing as needed before fully closing.

Fasten off and close.

Attach the keychain ring.

Finished!


วันเสาร์ที่ 8 กุมภาพันธ์ พ.ศ. 2568

How to crochet flower stamens using single crochet (SC)

  1. Start with a Magic Ring:

    • Make a loop with the yarn and pull the yarn through to create a Magic Ring. This allows you to tighten the ring later.
  2. Chain 1 (Knot):

    • Chain 1 to create a knot.
  3. Single Crochet into the Magic Ring:

    • Insert your hook into the Magic Ring and make 1 single crochet (SC). Repeat this step around 8 times to form a small circle inside the ring.
  4. Tighten the Ring:

    • Once you've made the desired number of single crochets, pull the tail of the Magic Ring tightly to close the circle.
  5. Finish:

    • Cut off any excess yarn. Pull the yarn through the last loop, and then use a needle to go through the first single crochet stitch to add a stitch. Tie a knot to secure it and weave in any remaining loose ends.

This process will create the stamen for your crocheted flower!


วันพุธที่ 5 กุมภาพันธ์ พ.ศ. 2568

Crocheting a Flower onto a Close Ring


Crocheting a flower onto a close ring is a fun and easy way to create a decorative flower piece for display on the front section of your work. Using the right technique ensures the flower stays securely attached to the ring without falling off.

Materials Needed:

Close Ring: Choose a ring that is the right size for crocheting the flower, such as plastic, stainless steel, or wood.

Yarn or Thread: Choose a high-quality yarn that is easy to crochet with.

Crochet Hook: The size of the hook depends on the yarn you choose.

Scissors: For cutting the yarn.

Steps for Crocheting a Flower onto a Close Ring

1.Starting with the Magic Ring

  • Begin by making a magic ring (Slip Knot), then crochet single crochet stitches (single crochet) in the ring, usually 6-8 stitches depending on the size of the flower you want.

  • Join the last stitch to form a circle, creating the base for the flower petals.

2.Crocheting the Flower Petals

  • Crochet "Single Crochet" or "Double Crochet" into the stitches of the base to create the flower petals.

  • Continue crocheting in a circle, adding or subtracting the number of petals as needed (typically 5-7 petals for a balanced flower).

  • Once all the petals are crocheted, the flower will be attached to the last stitch of the ring.

3.Securing the Flower to the Ring


4.Cutting the Yarn

  • After finishing the crochet work, cut any excess yarn and tie it off tightly to prevent it from unraveling.

  • Weave in any loose yarn ends neatly to give the flower a clean and tidy appearance.

Tips:

  • To give the flower more dimension and beauty, you can crochet the petals in multiple layers to add depth.

  • Experiment with different yarn colors to make the flower stand out and match your desired aesthetic.

Crocheting a flower onto a close ring is a creative way to make a unique piece of jewelry or decoration. Using secure crochet techniques, the flower will stay firmly attached to the ring, making it a durable piece of art without the need for glue. This method ensures your work will be sturdy and ready for use!


วันอังคารที่ 28 มกราคม พ.ศ. 2568

ลวดลายแกรนนีสแควร์ (Granny Square): เทคนิคการถักโครเชต์ที่คุณต้องรู้

ลวดลายแกรนนีสแควร์ (Granny Square) เป็นลวดลายโครเชต์ที่ได้รับความนิยมมากในการถักชิ้นงาน crochet ไม่ว่าจะเป็นการถักผ้าห่มโครเชต์ (crochet blanket), กระเป๋าโครเชต์ (crochet bag), หรือเสื้อผ้าโครเชต์ (crochet clothes) ลวดลายแกรนนีสแควร์  (Granny Square) จะมีเอกลักษณ์ที่สวยงามและสามารถนำไปใช้ในงานหลายประเภท ทำให้เป็นที่นิยมในหมู่คนที่ชื่นชอบงาน crochet

ลวดลายแกรนนีสแควร์ได้รับความนิยมเพราะมันมีลักษณะที่สามารถประยุกต์ใช้ในงานต่างๆ ได้มากมาย เช่น

ผ้าห่มโครเชต์ (Crochet Blanket): การถักแกรนนีสแควร์หลายๆ แผ่นมาประกอบกันจะทำให้ได้ผ้าห่มโครเชต์ที่มีลวดลายสวยงาม และสามารถเลือกสีตามต้องการ

กระเป๋าโครเชต์ (Crochet Bag): ลวดลายแกรนนีสแควร์สามารถนำมาใช้ในการทำกระเป๋าโครเชต์ที่มีลวดลายสวยงามและทันสมัย

เสื้อผ้าโครเชต์ (Crochet Clothes): การใช้แกรนนีสแควร์ในเสื้อผ้าโครเชต์เช่นเสื้อหรือกระโปรงจะเพิ่มความสวยงามและความเป็นเอกลักษณ์ให้กับผลงาน


การถักลวดลายแกรนนีสแควร์นั้นไม่ซับซ้อน โดยการใช้ double crochet (ห่วงคู่) และ slip stitch ในการสร้างลวดลาย การถักจะเริ่มจากห่วงกลางแล้วเพิ่มแถวออกไป

เริ่มต้นการถักห่วงกลาง: ใช้เทคนิค magic ring หรือโซ่คล้องเป็นวงกลม เพื่อทำห่วงกลางแล้วเริ่มถักแถวแรก

เพิ่มแถวและมุม: ถักแถวแรกเสร็จแล้วให้เพิ่มห่วงในมุมของแต่ละสี่เหลี่ยม เพื่อให้ขยายขนาดได้ตามต้องการ

การเปลี่ยนสีไหมพรม: การเปลี่ยนสีในแต่ละแถวจะทำให้ลวดลายแกรนนีสแควร์ดูสวยงามและมีลวดลายที่น่าสนใจ

การเลือกสีไหมพรม: การเลือกใช้สีไหมพรมเพียงสีเดียวหรือหลายๆสีก็ยิ่งจะช่วยให้ลวดลายของแผ่นแกรนนีสแควร์ดูมีชีวิตชีวาและมีเอกลักษณ์ที่โดดเด่น

ประโยชน์ของการใช้แกรนนีสแควร์ในงานโครเชต์ จะมีความยืดหยุ่นในการใช้งาน สามารถสร้างความหลากหลายได้มากมายเพื่อเพิ่มความสวยงาม ไม่ว่าคุณจะเป็นผู้เริ่มต้นหรือผู้มีประสบการณ์ ลวดลายแกรนนีสแควร์ก็เป็นตัวเลือกที่ดีในการสร้างสรรค์งาน crochet ของคุณ

วันจันทร์ที่ 27 มกราคม พ.ศ. 2568

How to Join Paracord for Crochet Projects.


When working with paracord in crochet, you often need to join two pieces of cord together to extend the length or to complete a design. Here’s a simple method to join paracord effectively:

1. Use a Lighter to Seal the Ends
First, take one end of the paracord and gently melt it using a lighter. Hold the flame near the end until the fibers begin to soften and melt slightly. Be careful not to burn the cord too much; just enough to make it tacky.

2. Attach the Two Ends
After melting one end, quickly press it against the other paracord end you want to join. Hold the ends together for a few seconds, allowing the melted material to fuse. This creates a strong, seamless connection between the two pieces.


3. Let it Cool
Allow the joined area to cool and solidify before using it in your crochet project. This ensures the bond is firm and the paracord stays securely connected.


Important Precaution :
Be mindful of the heat when working with paracord. The melted section can become very hot, so avoid touching the jointed area right after it’s been fused. Always wait until the paracord cools down before handling.


วันอาทิตย์ที่ 26 มกราคม พ.ศ. 2568

Crochet Technique to Join a Two-Colored Square with a Magic Ring


Crochet enthusiasts often enjoy the creativity and versatility that come with combining different yarn colors. One beautiful technique to explore is joining a two-colored square using a magic ring. This technique not only adds dimension and style to your project but also creates a smooth and professional finish. Here’s a step-by-step guide to help you achieve this look.

Materials Needed:

  • Two colors of yarn

  • Crochet hook (size according to yarn weight)

  • Scissors

  •  Yarn needle

  • Markers

Steps:

1. Make the Magic Ring: Start by creating a magic ring with two different yarn colors. Hold both yarns together and begin by forming a loop, then proceed to make your first stitch (usually a chain stitch) to secure the ring.


2. Crochet in Double Crochet: Work in double crochet (dc) just like when you make a standard granny square. For this step, you will alternate between the two yarn colors. Use one color for the first half of the stitches, and then switch to the second color for the remaining stitches. This creates a distinct two-colored pattern.


3. Joining the Colors: To join the two colors seamlessly, use a special joining technique. One common method is to join with a slip stitch while working the last stitch in each round. You can also incorporate a color-changing technique by dropping one color while picking up the other as you move through the rounds.


4. Add More Rows (Optional): If desired, you can continue by adding more rows, expanding the square beyond the initial two rows. This will give you a larger, more intricate design. You can alternate colors with each new row or create a gradient effect for a unique look.

This two-colored magic ring technique is a fun and effective way to create beautiful crochet squares. 


#crochet #square #join #begin #two #create #trick #technique #granny #Howto #youtube #video #vdo 

วันศุกร์ที่ 24 มกราคม พ.ศ. 2568

Reverse Single Crochet A Step-by-Step Guide


Single crochet (sc) is one of the most basic and commonly used stitches in crochet. While learning the basic single crochet stitch is important, this stitch can also be adapted to create more complex patterns. One such interesting technique is "Reverse Single Crochet," also known as the "Crab Stitch," which helps create beautiful edges and can add texture and interest to your crochet projects.


When to Use Reverse Single Crochet

Reverse Single Crochet (Reverse sc), or Crab Stitch, is a technique where you crochet a single crochet stitch from right to left instead of the usual left to right (for right-handed crocheters). This technique is often used to create textured, spiral-like edges in your projects. It is ideal for adding a decorative edge to scarves, blankets, or any project that requires a beautiful, textured border.
Reverse single crochet is suitable for use as a border in various projects, such as scarves, blankets, hats, or even around granny squares, to add a spiral-like design and texture to the edges. This gives your work a more professional and polished look.

Benefits of Reverse Single Crochet  :

Textured Edges: Reverse single crochet creates beautiful, spiral-like edges with texture.

Great for Borders: This technique is perfect for creating borders for blankets, scarves, and other projects.

Easy to Learn: Once you've mastered basic single crochet, reverse single crochet is easy to learn and can be incorporated into a wide range of projects.

*** Just be sure to choose a crochet hook that matches the yarn size for your project.


How to Crochet Reverse Single Crochet :

1. Start by crocheting the foundation row using regular single crochet.


2. Once you've completed the foundation row, insert the hook from front to back into the next stitch, moving in the opposite direction from usual.


3. Yarn over, and pull through the stitch. You will now have two loops on your hook.


4. Yarn over again and pull through both loops to complete the reverse single crochet stitch.


5. Continue crocheting reverse single crochet across the row or around the edge of your project until finished.


DIY Granny Square Block


Making a DIY Granny Square block is a fun and creative activity that helps keep your square crochet pieces in shape. By using square wooden blocks and round wooden sticks, you can prevent the crochet squares from losing their shape, keeping them neat and organized.


Materials :


  • Square wooden blocks (cork wood) 


  • Round wooden sticks 


  • Ruler 


  • Pencil 

---


Steps :


1. Prepare the Square Blocks :


Take the square wooden blocks (cork wood) and arrange them in the desired size for your Granny Square pattern. 


2. Measure and Mark :


Use the ruler to measure the distances where you want to place the round wooden sticks. Mark the points lightly with a pencil. 


3. Attach the Round Sticks :


Take the round wooden sticks and attach them to the marked points on the wooden blocks. You can use glue or small nails for this, and it is recommended to use glue to ensure better stability and strength. 


วันอาทิตย์ที่ 19 มกราคม พ.ศ. 2568

กระเป๋าไหมพรม ศิลปะและแฟชั่นที่ไม่เคยล้าสมัย


กระเป๋าไหมพรมถือวาเป็นหนึ่งในแฟชั่นที่ได้รับความนิยมอย่างต่อเนื่องเลยทีเดียว  ด้วยความสวยงามและเอกลักษณ์ที่ไม่เหมือนใครนั้นทำให้กระเป๋าไหมพรมกลายเป็นที่นิยมในหมู่คนรักแฟชั่นประเภทนี้

กระเป๋าที่ถูกถักอย่างพิถีพิถันด้วยน้ำพักน้ำแรงคนถักนี้ยังสามารถปรับให้เหมาะกับสไตล์การแต่งตัวและโอกาสต่าง ๆ ได้หลากหลายอีกด้วย 


กระเป๋าไหมพรมมีหลากหลายรูปแบบค่ะ ตั้งแต่กระเป๋าใบเล็กสำหรับใส่เหรียญ ใส่เครื่องเขียน กระเป๋าถือ กระเป๋าสะพายไปจนถึงกระเป๋าถักแบบที่มีการตกแต่งเพิ่มเติม อย่างเช่น การใช้ลูกปัดหรือการเย็บปักถักร้อยเพื่อเพิ่มความสวยงามให้กับกระเป๋า กระเป๋าชนิดนี้สามารถออกแบบให้มีความเป็นเอกลักษณ์ตามความต้องการของผู้ใช้ เนื่องจากไหมพรมมีลักษณะอ่อนนุ่มและยืดหยุ่น จึงสามารถปรับให้เข้ากับรูปร่างและขนาดที่ต้องการได้อย่างลงตัว


เรื่องการดูแลรักษากระเป๋าไหมพรมนั้น ข้อควรระวังเมื่อใช้งานกระเป๋าไหมพรมคือการดูแลรักษาที่ดี เนื่องจากวัสดุไหมพรมสามารถเปื่อยยุ่ยหรือเสียหายได้หากไม่ดูแลอย่างถูกวิธี การทำความสะอาดกระเป๋าไหมพรมสามารถทำได้โดยการซักมือหรือนำไปซักแห้งตามคำแนะนำจากผู้ผลิต (ส่วนใหญ่แล้วคือจะระวังเรื่องการบิดเพื่อรีดน้ำและตอนตาก) นอกจากนี้ยังควรหลีกเลี่ยงการถูกน้ำหรือความชื้นมากเกินไป เพราะอาจทำให้ไหมพรมเสื่อมสภาพ 


แน่นอนว่ากระเป๋าไหมพรมยังคงได้รับความนิยมและมีความหลากหลายในการใช้งาน ซึ่งสามารถเป็นทั้งเครื่องประดับและเป็นสิ่งที่ช่วยเพิ่มเสน่ห์ให้กับผู้ใช้ได้อย่างลงตัว

ถ้าหากคุณสนใจที่จะลองถักเพลินๆเป็นงานอดิเรก โดยไม่ต้องเร่งรีบ คุณก็สามารถมีกระเป๋าไหมพรมที่คุณผลิตเอง คุณก็สามารถทำได้เช่นกัน 


วันศุกร์ที่ 17 มกราคม พ.ศ. 2568

Crochet flower making is a fun and easy for beginner

 Crochet flower making is a fun and easy for beginner.


Crochet flower making is a fun and easy craft that can be done using yarn and crochet hook. Below is a simple method for creating a crochet flower.


Materials needed:

1.Yarn (color of your choice)

2.Crochet hook (appropriate size for the yarn)

4.Scissors

5.Sewing needle (if necessary for attaching the flower)


Steps to crochet a flower:


1. Start the circle:

Create a slip knot and chain 4 stitches.

Join the chain at the end with a slip stitch to form a circle, or you can use a magic ring to start.


2. Crochet the petals:

Chain 3 stitches to serve as the first double crochet.

Then, crochet 2 double crochets into the ring, chain 3 stitches, and slip stitch into the ring.


*Repeat the process until you have 5 petals.


3. Finish the flower:

Make 1 chain stitch, and cut the yarn, leaving a tail.


4. Hide the tail:

Use a sewing needle to hide the yarn tail.


5. Optional embellishments:


You can add beads, buttons, or other materials in the center of the flower to enhance its appearance.

Once finished, the crocheted flower can be used for various purposes, such as decorating cards, embellishing clothing, or as a gift.


วันพฤหัสบดีที่ 16 มกราคม พ.ศ. 2568

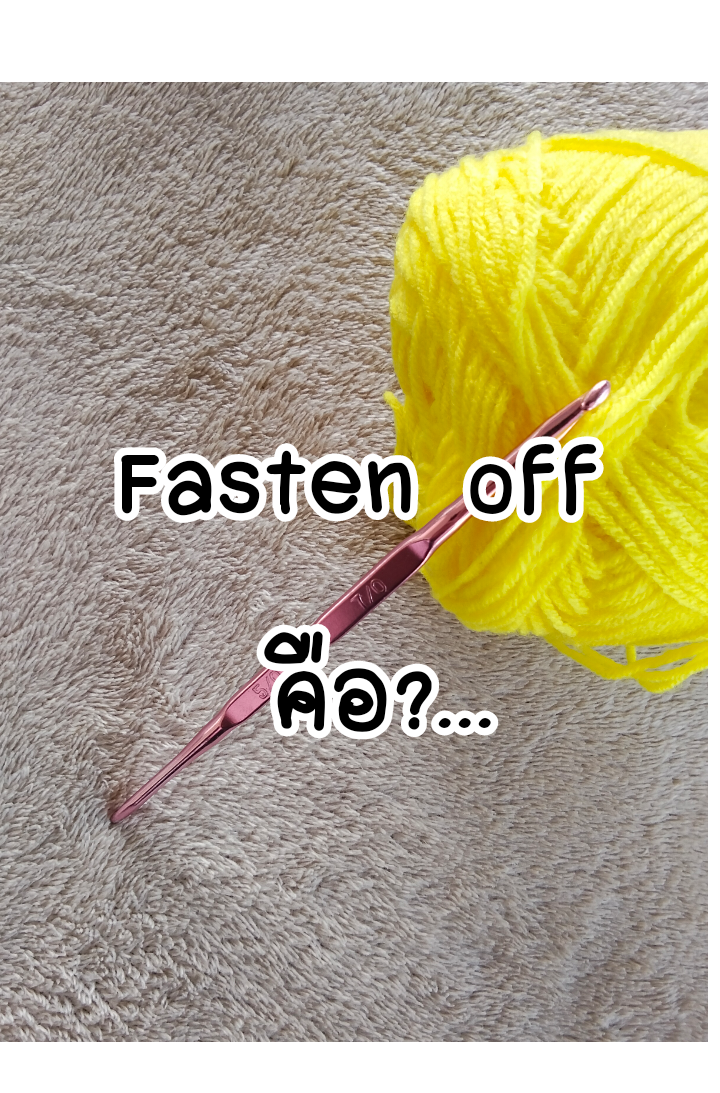
คำว่า fasten off ในการถักโครเชต์มีความหมายว่าอย่างไร

คำว่า "fasten off" ในการถักโครเชต์มีความหมายว่า "การทำให้ไหมพรมสิ้นสุด" หรือ "การปิดงาน" ซึ่งจะทำโดยการตัดไหมพรมและเก็บปลายไหมพรมเพื่อไม่ให้หลุดออกจากชิ้นงาน การใช้คำนี้ในคำแนะนำโครเชต์ถือเป็นศัพท์เฉพาะที่เข้าใจง่ายและได้รับการยอมรับในวงการโครเชต์ทั่วโลก แต่ยังมีคำอื่นๆ ที่สามารถใช้ได้ขึ้นอยู่กับความสะดวกในการเขียนหรือการอธิบายให้ผู้อ่านเข้าใจ

คำที่สามารถใช้แทน "fasten off" ได้

1. "Finish off"  ทำการปิดงาน – การปิดงานหมายถึงการทำให้เสร็จสิ้นงานโครเชต์โดยการตัดไหมพรมและเก็บปลายไหมพรมให้เรียบร้อย


2. "Cut the yarn" ทำการตัดไหม – การตัดไหมพรมที่ใช้และทำการเก็บปลายไหม


3. "Tie off"  ทำการเสร็จสิ้น" อธิบายการทำงานให้เสร็จสมบูรณ์ เช่น การตัดไหมและเก็บปลายไหมพรม


4. "Secure the yarn end" ปิดปลายไหม – การทำให้ปลายไหมพรมไม่หลุดออกจากชิ้นงาน


ทั้งคำว่า "fasten off" และคำอื่น ๆ นั้นสามารถใช้ได้ทั้งหมด ซึ่งการเลือกใช้คำขึ้นอยู่กับสไตล์และความสะดวกในการอธิบายเพื่อให้ผู้อ่านเข้าใจได้ง่ายและเร็วที่สุด

วันอังคารที่ 14 มกราคม พ.ศ. 2568

The Importance of Yarn Color Selection in Crochet and Knitting


When it comes to crocheting or knitting, choosing the right yarn color is important. Color not only affects the appearance of the finished piece, but also conveys the desired mood or feeling. In addition, craftsmen should consider the material of the yarn and the intended use of the piece.

1. Consider the meaning of color: Yarn color can reflect different emotions and convey different meanings.

Warm tones (red, orange, yellow): These colors are suitable for bright, warm, or cheerful works, such as winter sweaters or scarves.

Cool tones (blue, green, purple): These colors are calm and relaxing, suitable for items such as blankets or shawls that are comfortable.

Neutral tones (beige, cream, gray): These colors are simple and elegant, suitable for creating luxurious pieces, such as knitwear or sofa throws.

2. Choose colors according to the use: If the project involves clothing that will be worn frequently, choose easy-to-care colors, such as basic shades such as black, navy, or gray, which are not easy to stain.

For home decorations, such as blankets or cushions  Choose a color that matches the overall decor of the room.

3. Yarn colors can reflect the season:

For summer, choose bright colors, such as light blue or green.

For winter, dark colors, such as deep red, purple or brown, convey warmth and comfort.

4. Mixing colors Using multiple colors in your knitting can create interesting patterns and colors. 

Using contrasting colors, such as pink and blue, or red and green to create a striking effect. 

Using complementary colors, such as light green and white, or brown and beige, to create a harmonious and subtle look.

5. Yarn colors may look different when using different materials. 

Yarns made from natural materials, such as wool or cotton, tend to have soft and natural colors. 

Yarns made from synthetic materials may have brighter and shinier colors. 

6. Test the color with a sample before starting a large project. It is best to make a small sample to see how the color will look when the project is complete.

Choosing the right color for your yarn for both the use and the mood you want to convey will help your work stand out even more.

Have fun producing your work!


วันจันทร์ที่ 13 มกราคม พ.ศ. 2568

การเลือกสีไหมพรมในการถักชิ้นงาน

การเลือกสีไหมพรมในการถักชิ้นงานมีความสำคัญมาก ไม่ว่าจะถักโครเชต์(Crochet)หรือนิตติ้ง(Knitting) เพราะสีที่เลือกจะมีผลต่อรูปลักษณ์ของชิ้นงานนั้นๆ และยังสื่อถึงอารมณ์ที่ต้องการถ่ายทอด นอกจากนี้นักถักยังควรคำนึงถึงวัสดุของไหมพรมและการใช้งานของชิ้นงานนั้น ๆ ด้วย 


1. พิจารณาความหมายของสี ซึ่งสีไหมพรมสามารถสะท้อนถึงอารมณ์และสื่อความหมายที่แตกต่างกัน 

สีอบอุ่น (แดง, ส้ม, เหลือง): เหมาะสำหรับชิ้นงานที่ต้องการสร้างความสดใสและอบอุ่น เช่น เสื้อกันหนาว หรือผ้าพันคอในฤดูหนาว

โทนสีเย็น (ฟ้า, เขียว, ม่วง): สีเหล่านี้ก็จะให้ความรู้สึกสงบและผ่อนคลาย เหมาะสำหรับการถักผ้าห่มหรือผ้าคลุมที่ต้องการความสบาย

โทนสีเนื้อ (เบจ, ครีม, เทา): สีเหล่านี้จะให้ความรู้สึกเรียบง่าย เหมาะกับการถักชิ้นงานที่ต้องการความหรูหรา เช่น เสื้อไหมพรม หรือผ้าคลุมโซฟา


2. เลือกสีตามการใช้งาน หากชิ้นงานอย่างการถักเสื้อผ้าที่จะใส่บ่อย ควรเลือกสีที่ใช้งานง่าย เช่น สีพื้นๆ อย่างสีดำ น้ำเงิน หรือสีเทา ที่ไม่ทำให้สกปรกได้ง่าย

ถักชิ้นงานสำหรับของตกแต่งบ้าน เช่น ผ้าห่มหรือหมอนนั้นควรเลือกสีที่เข้ากับการตกแต่งในห้องนั้น ๆ


3. การเลือกสีตามฤดูกาล: สีไหมพรมนั้นสามารถสะท้อนถึงฤดูกาลเช่นกัน 

ในฤดูร้อน สีสดใส เช่น ฟ้า หรือเขียวอ่อน

ในฤดูหนาว สีเข้ม เช่น แดงเข้ม, ม่วง, หรือสีน้ำตาลให้ความรู้สึกอบอุ่น


4. การผสมสีคละสี ใช้หลายสีในการถักชิ้นงานสามารถสร้างสีสันลวดลายที่น่าสนใจได้ 

การใช้สีคอนทราสต์ หรือสีตรงข้าม อย่างเช่น สีชมพูกับฟ้า หรือสีส้มกับเขียว หรือแดงกับเขียว  เพื่อให้เกิดความโดดเด่น

การใช้สีที่เข้ากัน อย่างเช่น สีเขียวอ่อนและสีขาว หรือสีน้ำตาลและสีเบจ เพื่อให้เกิดความกลมกลืนและดูเรียบง่าย


5. สีไหมพรมอาจดูแตกต่างกันเมื่อใช้วัสดุที่แตกต่างกัน

ไหมพรมที่ทำจากวัสดุธรรมชาติ เช่น ขนสัตว์หรือฝ้าย มักมีสีที่ดูนุ่มนวลและเป็นธรรมชาติ

ไหมพรมจากวัสดุสังเคราะห์อาจมีสีที่สดใสและเงางามมากขึ้น


6. เราควรทดสอบสีด้วยตัวอย่าง ก่อนที่จะเริ่มถักชิ้นงานใหญ่ แนะนำให้ทำตัวอย่างเล็ก ๆ เพื่อดูว่าเมื่อไหมพรมถูกถักแล้ว สีที่ใช้นั้นจะออกมาเป็นอย่างไร

การเลือกสีไหมพรมให้เหมาะสมกับทั้งการใช้งานและอารมณ์ที่ต้องการถ่ายทอดจะช่วยให้ผลงานของคุณโดดเด่นยิ่งขึ้นได้ค่ะ

ขอให้มีความสุขกับการทำงานฝีมือค่ะ ^_^

วันพฤหัสบดีที่ 1 สิงหาคม พ.ศ. 2567

วิธีการถักโครเชต์กับซิบ เพื่อถักกระเป๋าใส่เหรียญ

 การถักโครเชต์ทำกระเป๋าสักใบ ซึ่งมีหลากหลายแบบ  ปากกระเป๋าก็มีแบบเปิด แบบรูด แบบติดซิบ ก็แล้วแต่นักถักจะทำผลงานชิ้นงานแบบใด 


ว่าด้วยการติดซิบปากกระเป๋าถักเนี่ย สามารถติดซิบได้ในขั้นตอนสุดท้ายเมื่อถักเป็นรูปร่างเรียบร้อย  แต่ถ้าจะเริ่มต้นจากซิบ อันนี้ล่ะค่ะที่จะยากขึ้นมาหน่อยเพราะต้องถักให้เส้นด้าย เส้นไหมพรมติดกับตัวซิบก่อน แต่ก็ไม่ยากจนทำไม่ได้ ก็เลยนำวิธีมาแนะนำค่ะ


วิธีถักสายกระเป๋าง่ายๆ

 สำหรับนักถักโครเชต์ (Crochet ) ที่กำลังฝึกหัดถักชิ้นงาน อย่างเช่นกระเป๋า เอาแบบมินิ ใบเล็กๆ แล้วลวดลายของสายกระเป๋า (Strap Bag) ก็อยากถัก มาลองถักลายง่ายๆกันค่ะ


ถักไม่ยากไม่งงแน่นอน ลายนี้ถ้าใครถักซิงเกิลโครเชต์ (Single Crochet) เป็นแล้วจะง่ายมากค่ะ


วันอังคารที่ 30 กรกฎาคม พ.ศ. 2567

ตุ้มหูโครเชต์ถักง่ายๆ


การถักโครเชต์ครั้งนี้ ถักไหมพรมทำตุ้มหูค่ะ ซึ่งการถักpatternลายนี้ สามารถใช้ด้ายถักก็ได้นะคก็แล้วแต่นักถักเลย ขอแค่ใช้เข็มโครเชต์ที่พอเหมาะกับขนาดเส้นไหมเส้นด้ายค่ะ


อุปกรณ์ที่จะขาดไม่ได้ก็คืออะไหล่ ตะขอเกี่ยว นั่นเอง ถ้ายังไม่มีอุปกรณ์ก็ดูวิธีถักไปก่อนก็ได้ ชอบลายนี้ค่อยหาอุปกรณ์มาทำก็ได้ค่ะ


วันจันทร์ที่ 29 กรกฎาคม พ.ศ. 2567

วิธีถักหูแมวด้วยโครเชต์

 นักถักหลายคนอยากจะถักโครเชต์หูสัตว์ซึ่งมีหลายรูปแบบ หลายชนิด บางคนยังไม่รู้จะเริ่มต้นอย่างไร จะทำแบบไหนดี มาลองถักสามเหลี่ยมใบหูน้องแมวกันค่ะ


การถักชิ้นงานนั้นนอกจากจะทำเป็นตัวตุ๊กตาแล้ว ก็มักจะนำไปทำเป็นกิ๊ฟ หรือประกอบกับที่คาดผมก็ได้ 


ตัวอย่างใบหูที่นำมาครั้งนี้ สามารถเปลี่ยนสีเพื่อให้เข้ากับสีผิวของสัตว์ ที่ต้องการถัก เช่นคลิปนี้จะเป็นหูแมวก็เลือกใช้สีที่ใกล้เคียงกับน้องแมวค่ะ


วันอาทิตย์ที่ 28 กรกฎาคม พ.ศ. 2567

ถักโครเชต์สี่เหลี่ยม Granny

 ในการถักไหมพรมด้วยการถักโครเชต์ (Crochet) นั้น การถักชิ้นงานแผ่นสี่เหลี่ยมให้เป็นแผ่นๆ (Granny Square) แล้วนำไปประกอบเป็นรูปร่างให้เป็นชิ้นงานอื่นๆ ได้ด้วย เช่น เสื้อ หมอน ผ้าห่ม ผ้าปูโต๊ กระเป๋า  เรียกได้ว่าหลากหลายเลยทีเดียว

 ในครั้งนี้ขอแนะนำลายที่เริ่มต้นด้วยลวดลายคล้ายกังหันค่ะ ลองดูนะคะว่าชอบลายนี้กันหรือเปล่า


จักรเย็บผ้ามือกดพกพา ตัวช่วยงานเย็บผ้าชิ้นเล็ก ใช้งานอย่างไร มาดูกัน

 ใครที่ชอบงานเย็บผ้า หรือบางครั้งมีเสื้อผ้าขาดเล็ก ๆ น้อย ๆ ที่ต้องการซ่อมแซมด้วยตัวเอง อาจกำลังมองหาอุปกรณ์เย็บผ้าที่มีขนาดเล็ก ใช้งานสะดวก...